Overview
While creating Wireframes i.e. screen prototypes, it is important to capture the screen and create a document for future reference and pass your thoughts to the other team members or stakeholders.
To make the process of capturing a screen and document its regions simple and systematic, TopTeam has a wizard called Capture Screen and Document.
Capture Screen and Document Wizard helps you capture any screen of an existing application and then document all the elements of that screen or document different requirements for different regions of the screen. This article describes how you can do that in detail.
Prerequisites
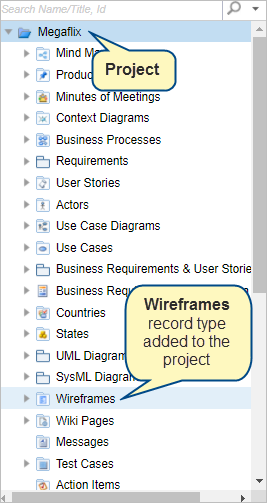
Before start using this feature, ensure that you have added the Wireframes record type to your project. To learn more about how to add record type, click here.
Step 1. Open the Capture Screen and Document Wizard from Detail Editor
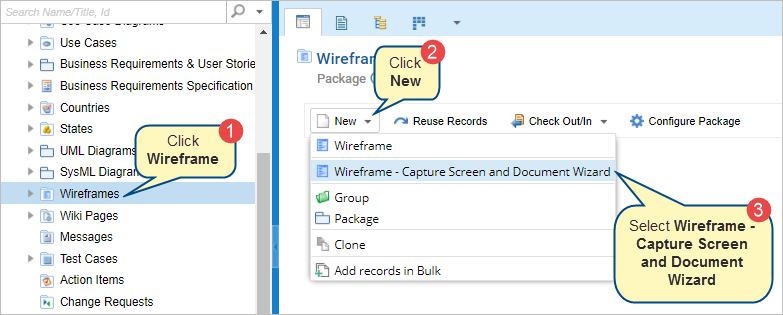
For the demonstration purpose, we will open the wizard from the Detail Editor of the Wireframe package.
Other methods to open this wizard are as follows:
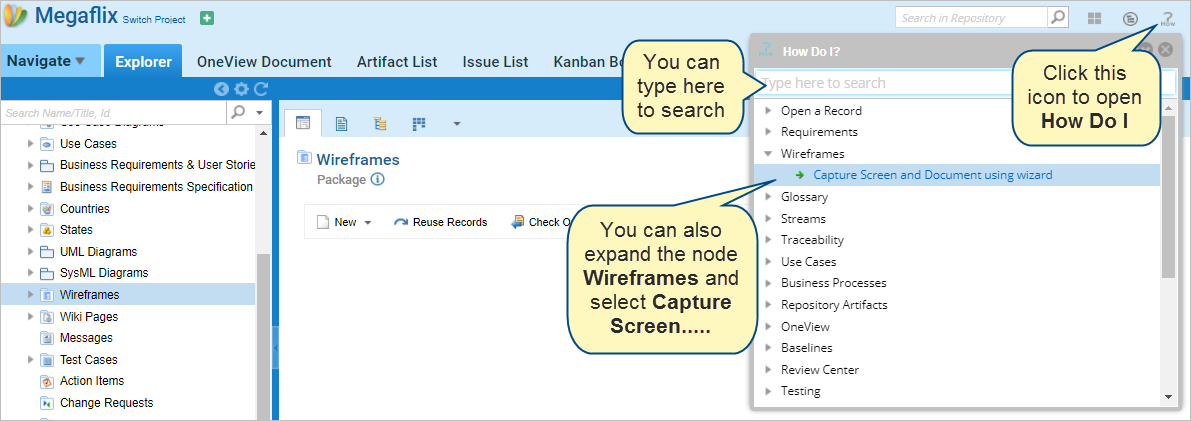
- From How Do I? > Type Capture Screen and Document using wizard in the search box and select Capture Screen and Document using wizard.
To learn more about How Do I?, click here.
|
INFORMATION
|
How do I is a quick search screen to locate different editors or actions available in TopTeam. You can access this feature from the top-right corner of the TopTeam web application. |

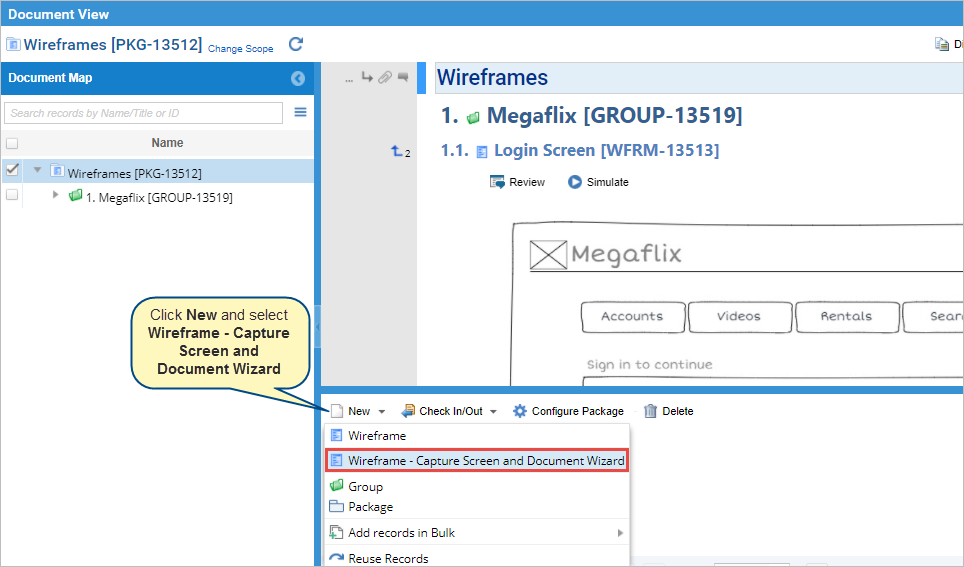
- From the Document View of the Wireframe package > Open Document View of the Wireframe package > Click the New drop-down menu in the package section > Select Wireframe – Capture Screen and Document Wizard.
To know more about Document View, click here.
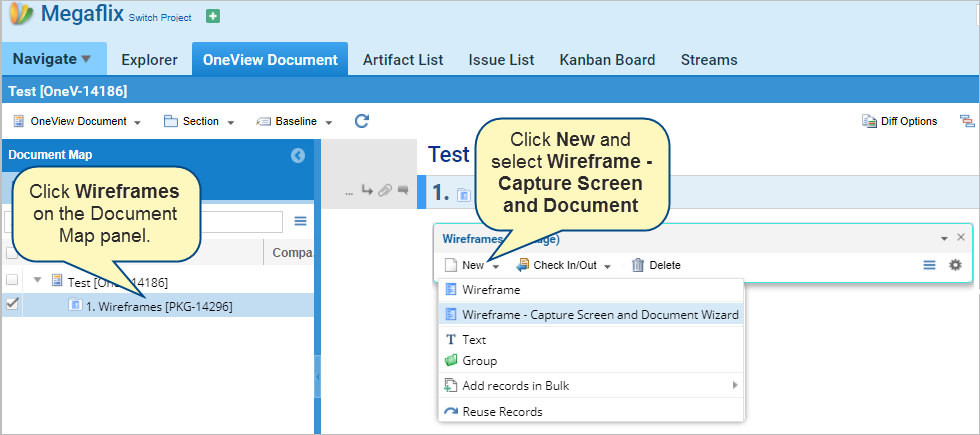
- From OneView Document: Go to OneView Document tab > Select your OneView Document > Click Wireframes on the Document Map panel > Click the New drop-down menu > Select Wireframe – Capture Screen and Document Wizard.
To know more about OneView, click here.
|
NOTE
|
Ensure that you have added the Wireframe Package section to the OneView Document. By default, the system doesn’t include Wireframe Packages in the OneView Document. To learn more about how to add a package section in the OneView Document, click here. |
Alternatively, you can also open from split window. The steps are the same as shown for Document View above.
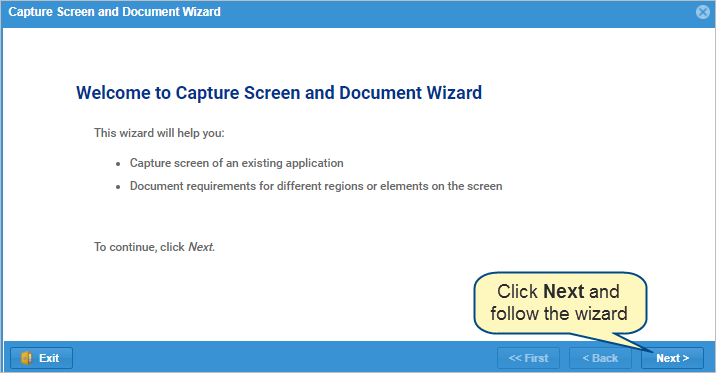
Step 2. The Capture Screen and Document Wizard starts
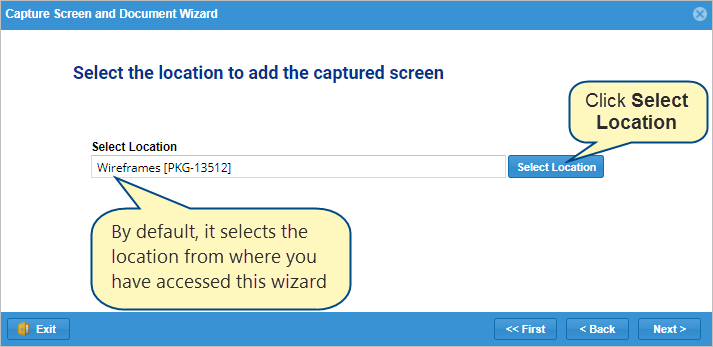
Step 3. Select the location to add the captured screen.
By default, it selects the location from where you have accessed this wizard.
Click Select Location to change from the default location to where you would like to add the captured screen. You can only select a location with the Wireframes package.
Click Next to proceed further.
|
NOTE
|
If you have opened the wizard from the OneView Document, then the wizard will not offer you to select a location to add the captured screen because it will automatically save in the OneView Document from where you have started the wizard. |
Step 4. Choose how you would like to capture the desired screen.
On this page of the wizard, you will have two alternatives (Capture Screen or Load Image) to capture a screen. Choose accordingly.
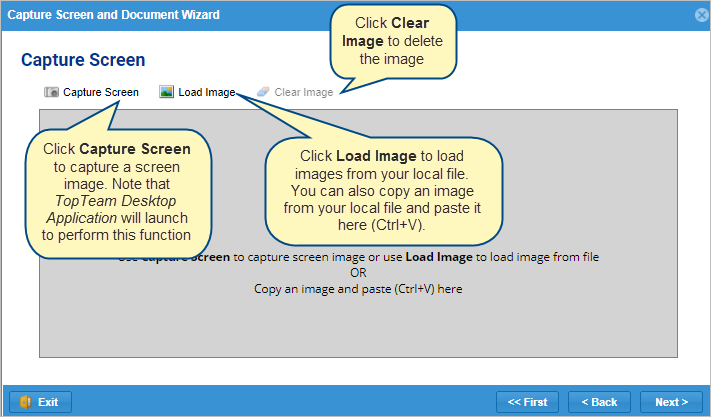
Capture Screen: Click Capture Screen to capture a screen image. Note that TopTeam Desktop Application will launch to perform this function. Hence, ensure that TopTeam Desktop Application is already opened before using this feature.
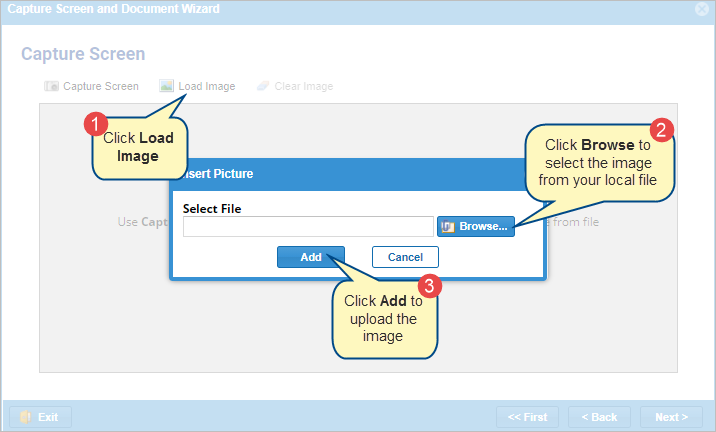
Load Image: Click Load Image to load images from your local file. You can also copy (Ctrl+C) an image from your local file and paste it here (Ctrl+V).
Clear Image: If the captured/loaded image is not up to the mark, click Clear Image to delete the image and re-start the capture/load image process.
After successfully capturing the screen/loading image, click Next to proceed further.
Step 5. Add documentation to the screen
Click Select Region & Describe to document areas of the captured screen.
To edit a previously selected region:
- Click the previously selected region.
- Hold and drag the handlebar of the selected region to your desired position.

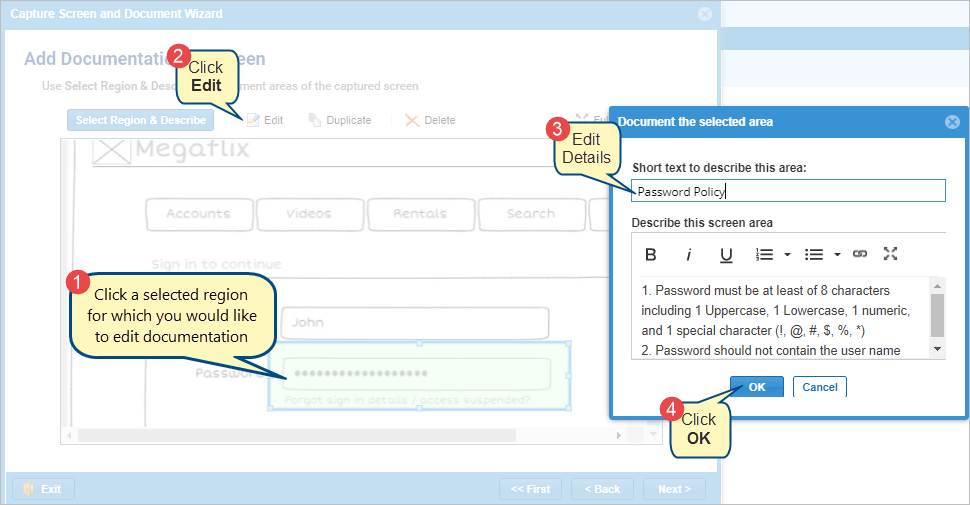
To edit previous documentation:
- Click the selected region for which you would like to edit documentation.
- Click Edit.
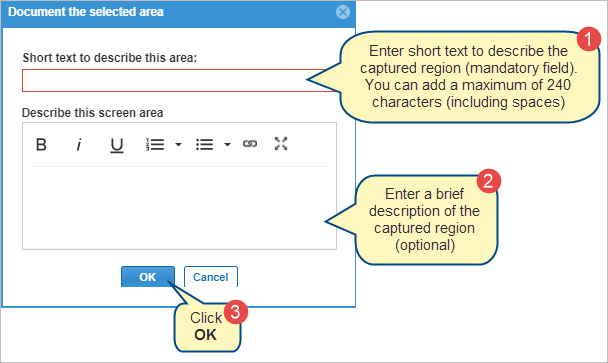
- Document the selected area pop-up screen will open with all the details that you have added earlier.
- Edit the details.
- Click OK.
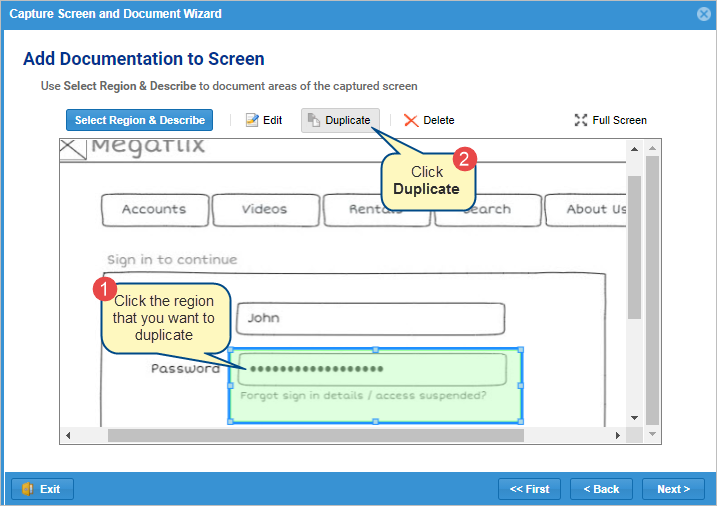
To create a duplicate of any selected region:
- Click the selected region that you want to duplicate.
- Click Duplicate.
|
NOTE
|
When you are duplicating a selected region, documentation will also get duplicated. However, you can edit the documentation later. |
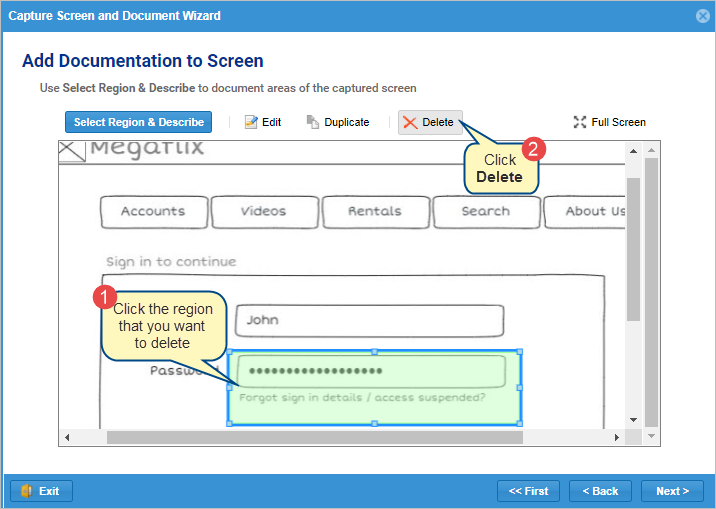
To delete a selected region and documentation:
- Click the selected region that you want to delete.
- Click Delete.
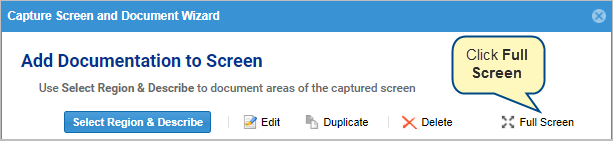
You can work on documentation on a full-screen view. To work on full-screen, click Full Screen at the top-right corner of the wizard screen.
Once you have completed the region selection and documentation process, click Next to proceed further.
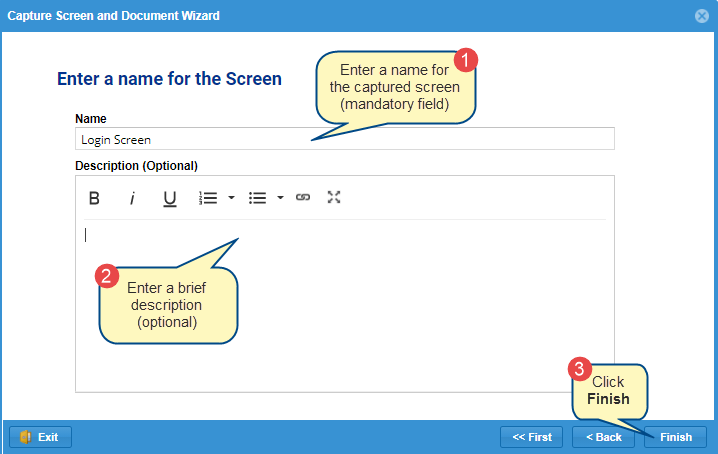
Step 6. Enter the screen name
Once you have entered a name and description (optional), click Finish to complete and save the wizard.
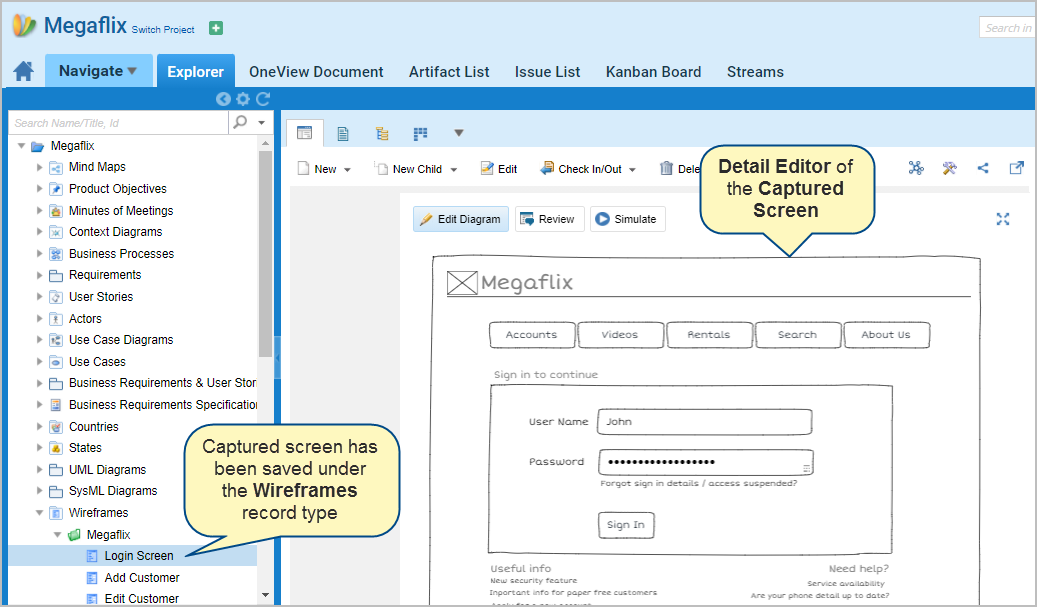
After finishing the wizard, you will find the captured screen in the location that you have selected previously.
Revised: October 15th, 2021