Overview
TopTeam Analyst to TopTeam Requirements Import utility is an application that performs data import from TopTeam Analyst repository into TopTeam Requirements repository.
This document describes the steps you must follow to install and run the import utility to import data from the TopTeam Analyst repository into TopTeam Requirements.
Who should read this?
- TopTeam Administrators
- IT Support
Installing the Import Utility
- Download the utility ZIP file provided by TechnoSolutions Support and extract it to a location on your hard drive with sufficient space. The import utility creates log files that can take up a significant amount of space. Therefore it is important that you install it on a drive where there is sufficient free space.
- Avoid extracting the file to the Program Files folder. Instead, choose a folder where you have write access. This will be referred to as the Installation Folder in the following steps.
- After extracting the ZIP file, locate the “ttmAnalystToReqImport.exe” file and run it.
- A wizard application will guide you through the process of importing your data.
Running the Import Utility
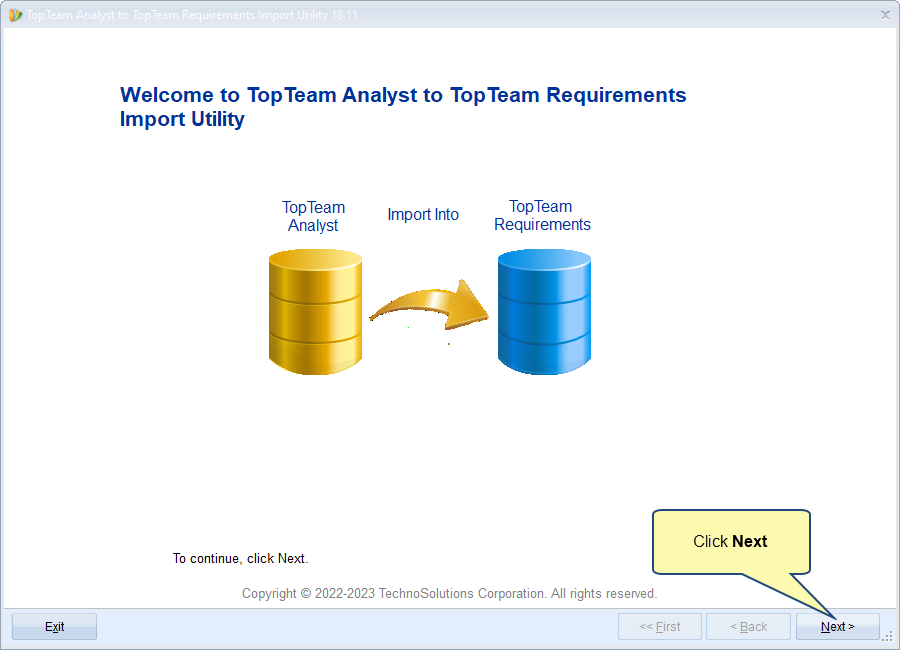
Step1. Run the Import Utility Wizard
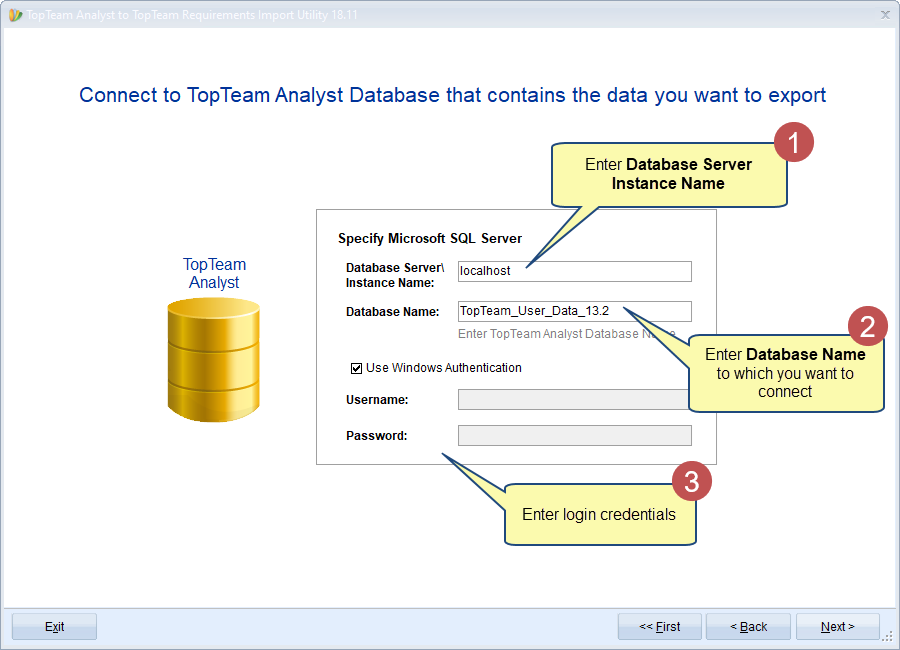
Step 2. Connect to TopTeam Analyst Database from where you want to import data into TopTeam Requirements
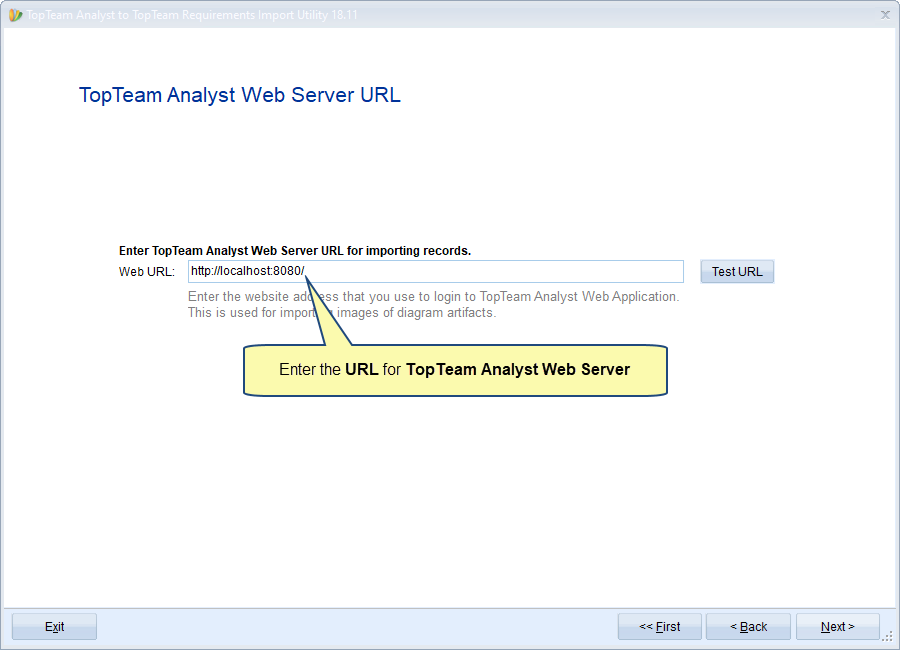
Step 3. Enter the TopTeam Analyst Web Server URL
This will log in to the Web Application. From here, images from diagram artifacts will be imported.
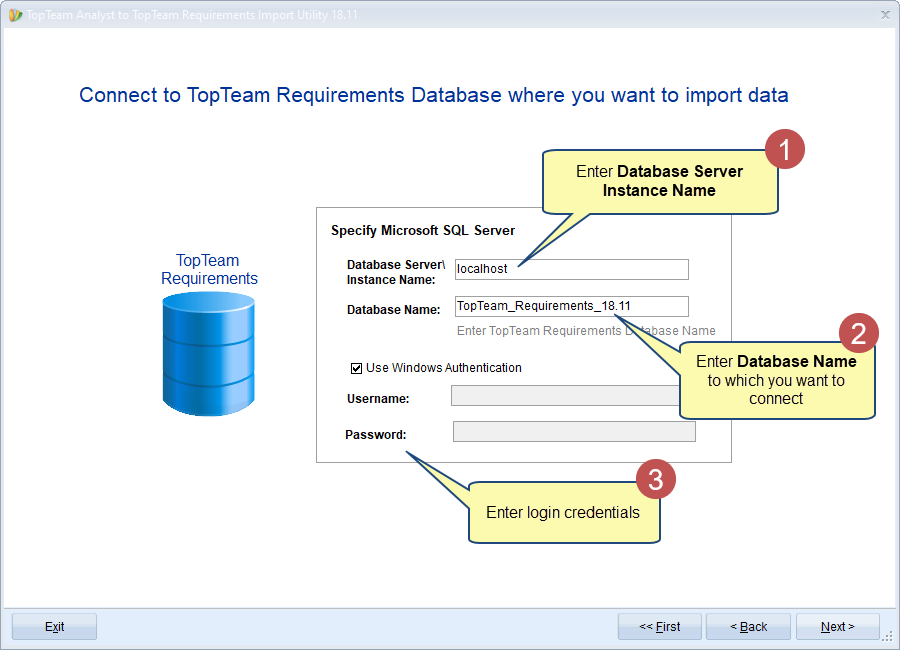
Step 4. Connect to TopTeam Requirements Database where you want to import data from TopTeam Analyst
Step 5. Click Next to Import Configuration Data
In this step of the wizard, metadata from your TopTeam Analyst repository, such as Record Types, States, Record Type Fields, and Link Types, will be imported.

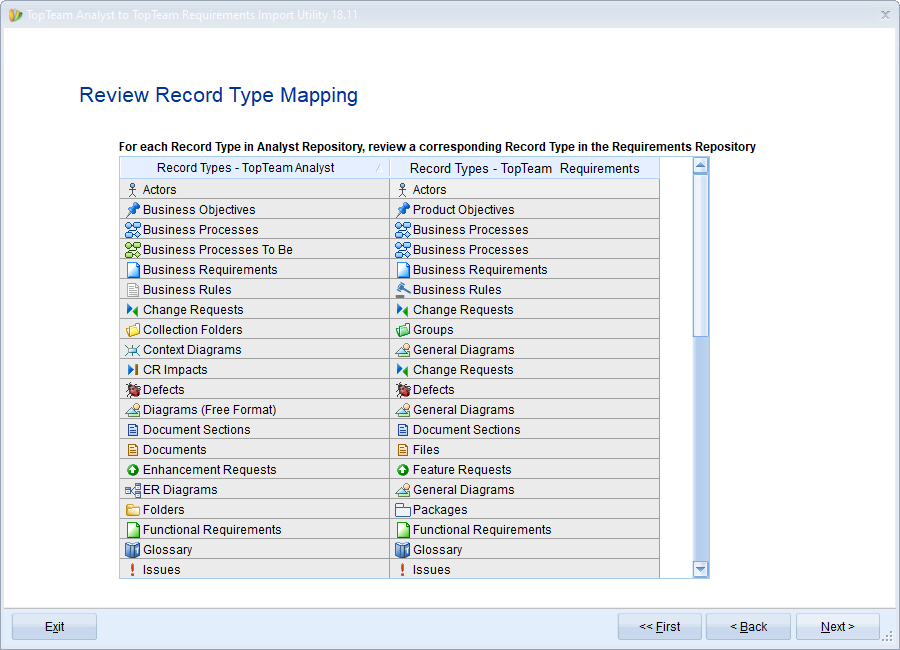
Step 6. Review Record Type Mapping
This step of the wizard displays a preview of all the record types that will be imported, along with their corresponding mappings to record types in TopTeam Requirements.
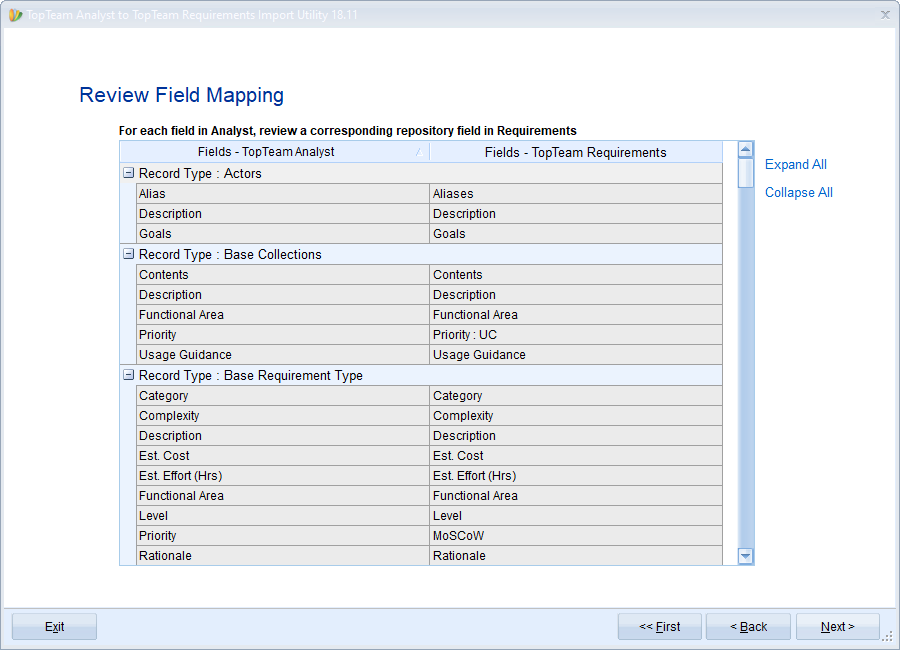
Step 7. Review Field Mapping
This step of the wizard displays a preview of all the fields that will be imported, along with their corresponding mappings to fields in TopTeam Requirements.
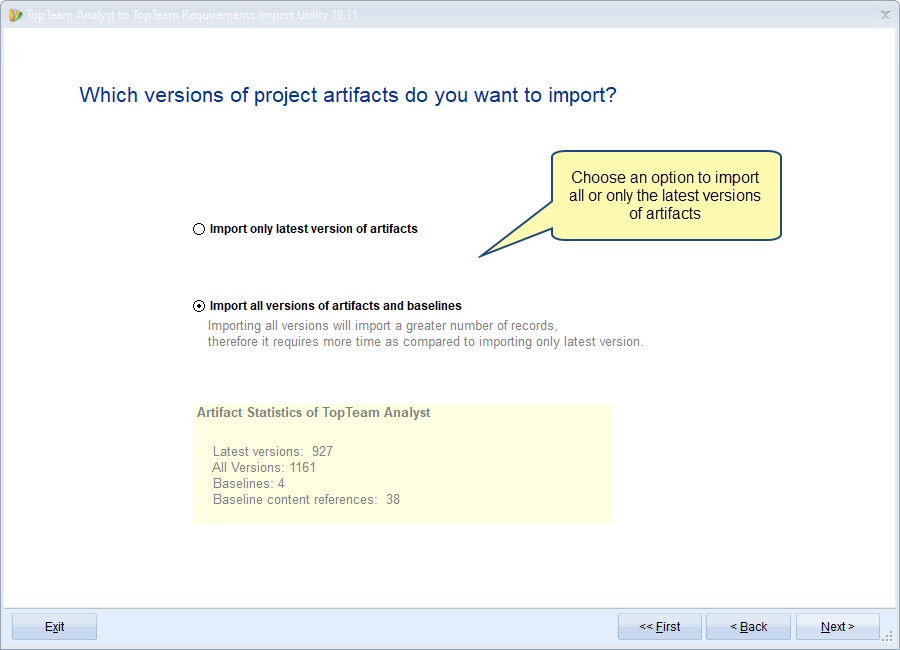
Step 8. Decide whether to import only the latest versions or all versions of repository artifacts
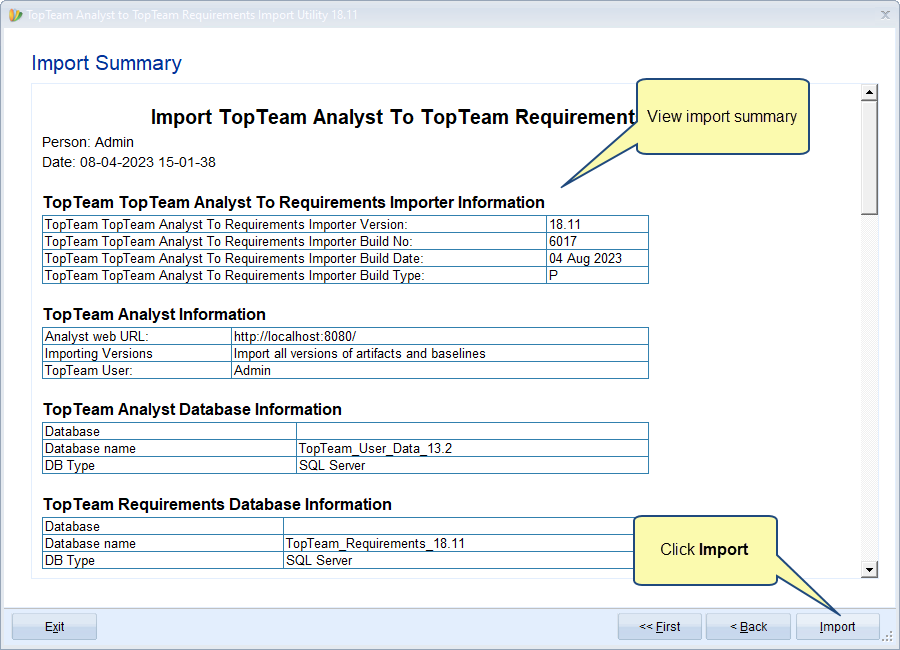
Step 9. View Import Summary
Step 10. Log files are generated
After clicking the Import button, the project data import process will begin, and log files will be created in the Logs folder.
We recommend sending the “ImportAnalystToRequirments_<date-time>.html” and ‘Migration Utility-<date-time>.log’ log files to TechnoSolutions Support for review. These files are created as soon as the import process starts and will continue to be updated throughout the process.
To send these files, make a copy of the initial log files and move the copies to a different location. Do NOT cut or delete the files from their location.
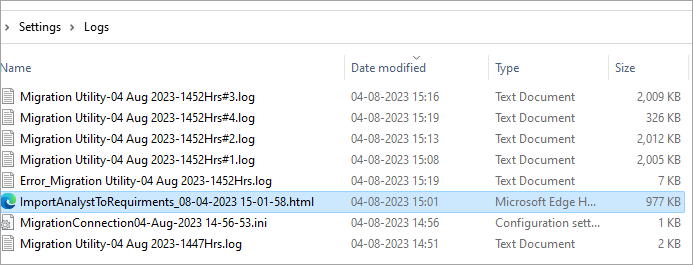
The Logs folder can be found at the following path:
<Utility installation Folder>\Settings\Logs

Step 11. Click Finish once the Import Process is completed
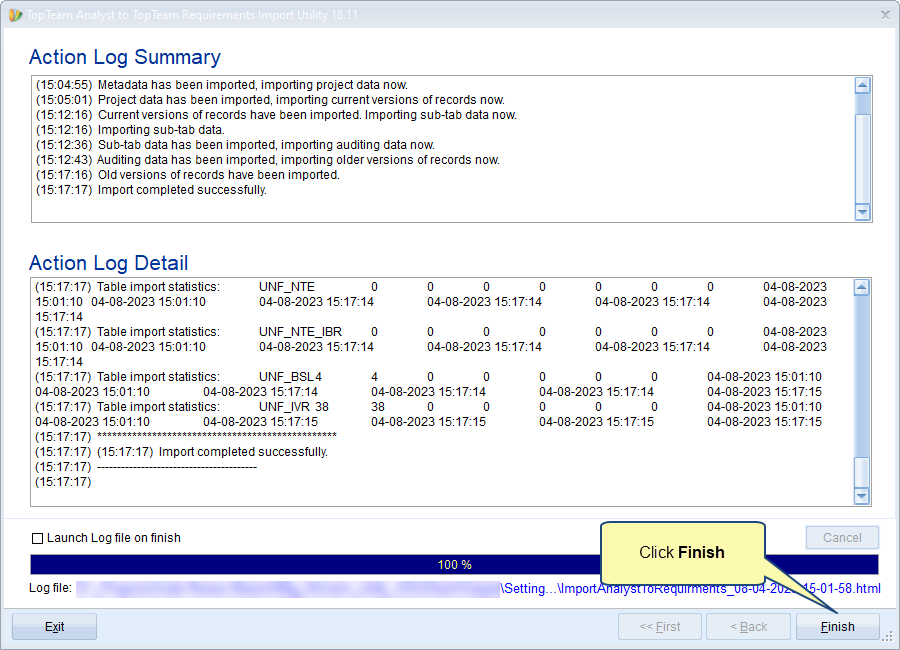
The import process may take longer, depending on your source repository size. Once the import is complete, create a zip file containing all the files in the Logs folder and send it to TechnoSolutions Support for review.
Revised: August 7th, 2023