Overview
Data Filters enable you to fetch artifacts based on specific criteria. The criteria for filtering differs from one record type to another, i.e., filter fields may vary depending on the record type you have selected. For instance, if you select User Stories, you can filter them based on the Acceptance Criteria.
You can create a new Data Filter using the New Filter option available in all List/Tree Editors.
Data Filters are of two types: Private and Public.
Private Filter is only visible to you, whereas Public Filters are visible to all system users.
This article describes the procedure for creating and applying a Data Filter in any List/Tree Editor.
Step 1. Open any List/Tree Editor
For more information, refer to the article:
Though the Data Filter can be opened from both Tree/List Editor, we will show it from the List Editor for demonstration purposes.
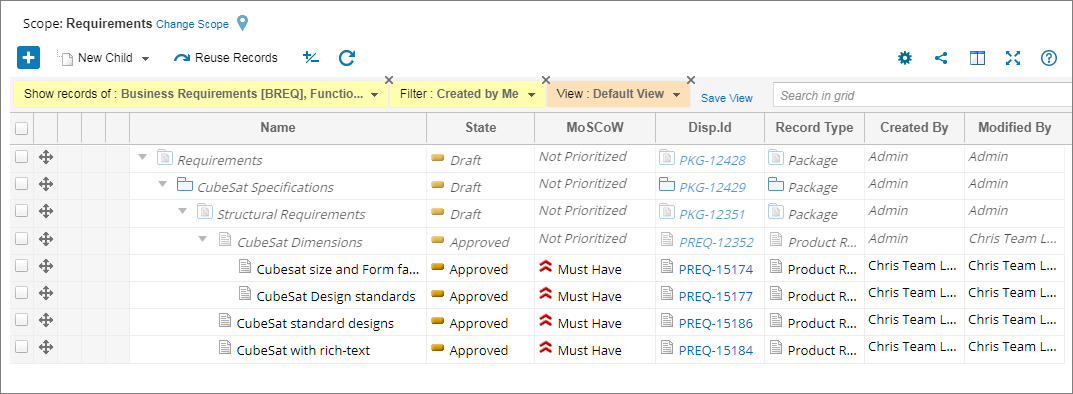
Step 2. Click Filter
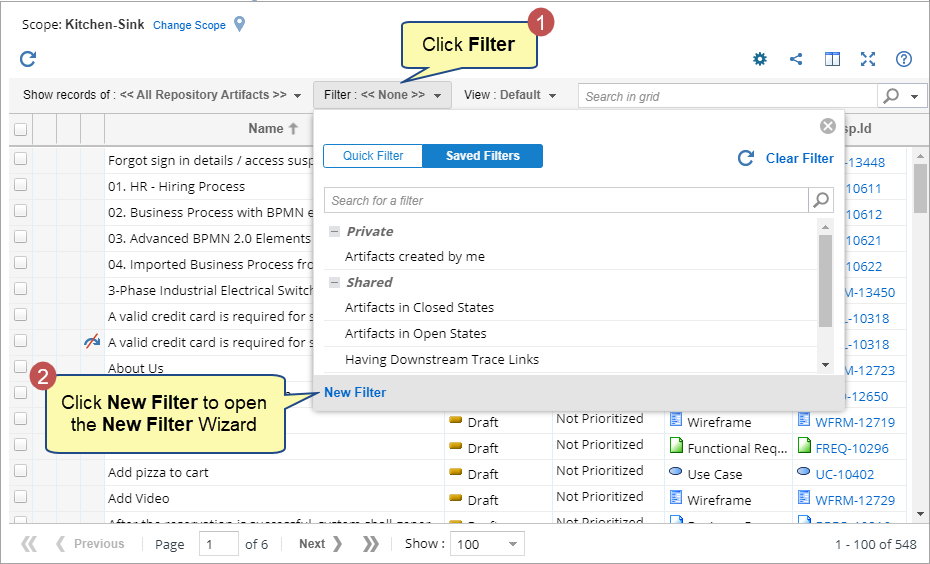
When you click Filter, a screen will open. There are two tabs on the screen: Quick and Saved Filter.
Quick
From the Quick tab, you can do the following:
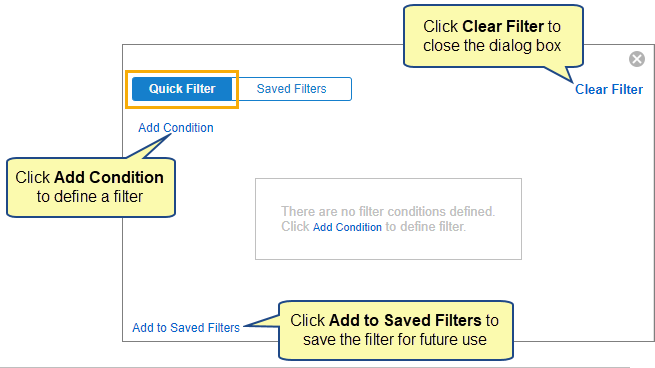
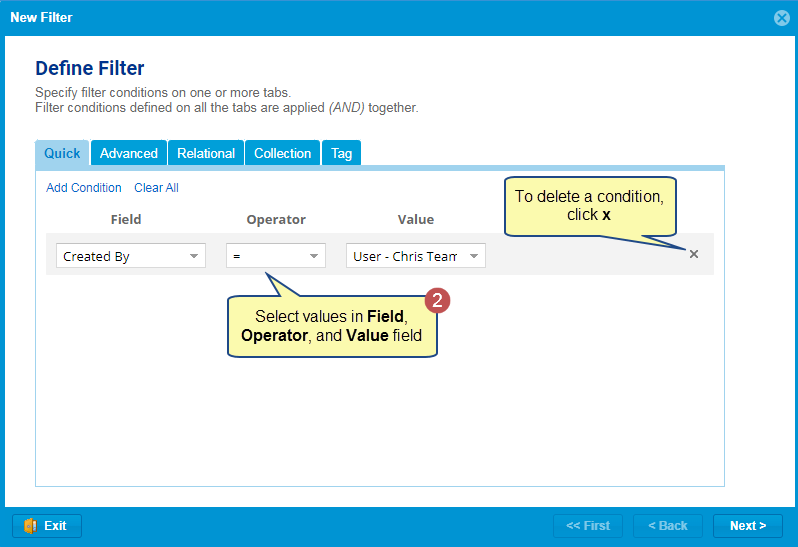
If you click Add Condition, you can add a filter. While creating a filter, you need to define three things:

Value shows options in the list based on the selected Field.
For example, if you have selected Created By in the Field, you will see a list of users in the Value list. However, if you have selected Check-out Date in the Field, you will see dates.
Saved Filter
On the Saved Filters tab, you will see all the saved filters. You can create a new filter as well.
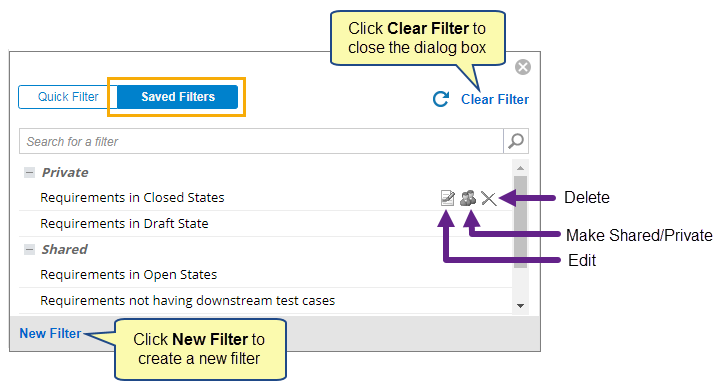
You can also Edit, Change the Visibility (Private to Shared or vice-versa), and Delete a saved filter.
Step 3. Click New Filter to open the New Filter Wizard
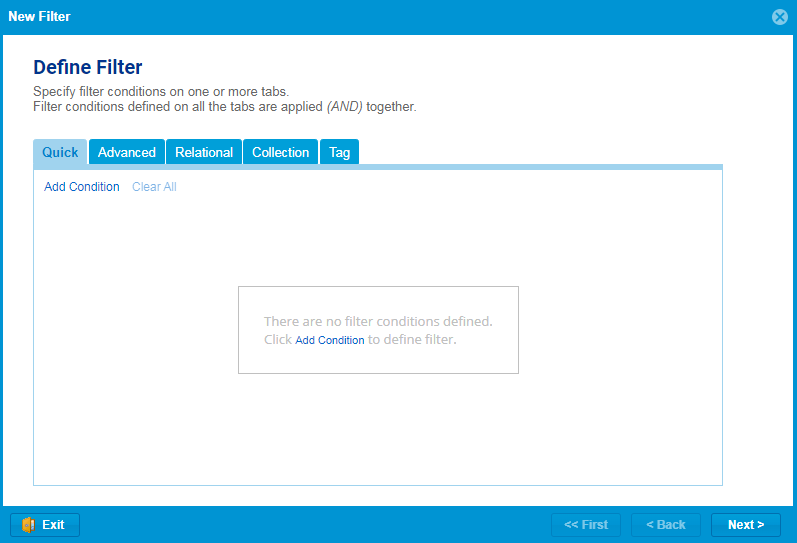
In this wizard, there are five tabs:
You can specify filter conditions on one or more tabs. Filter conditions defined on all the tabs are applied together.
We have discussed each tab in detail.
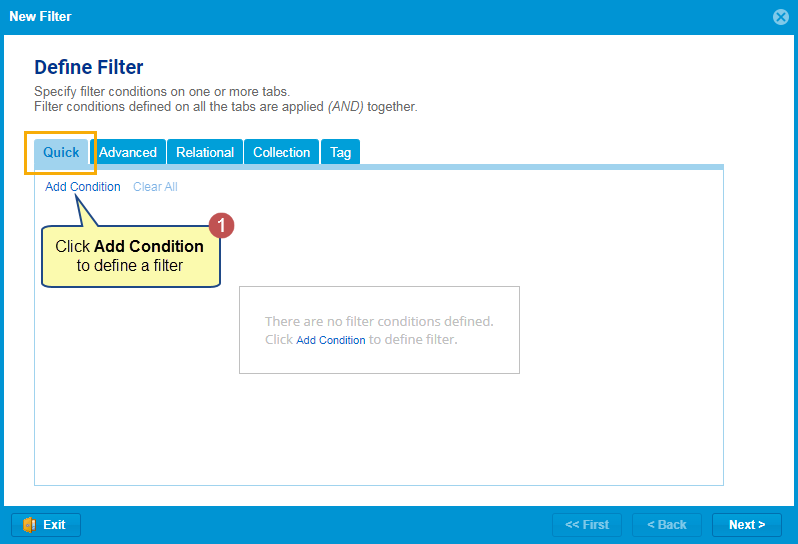
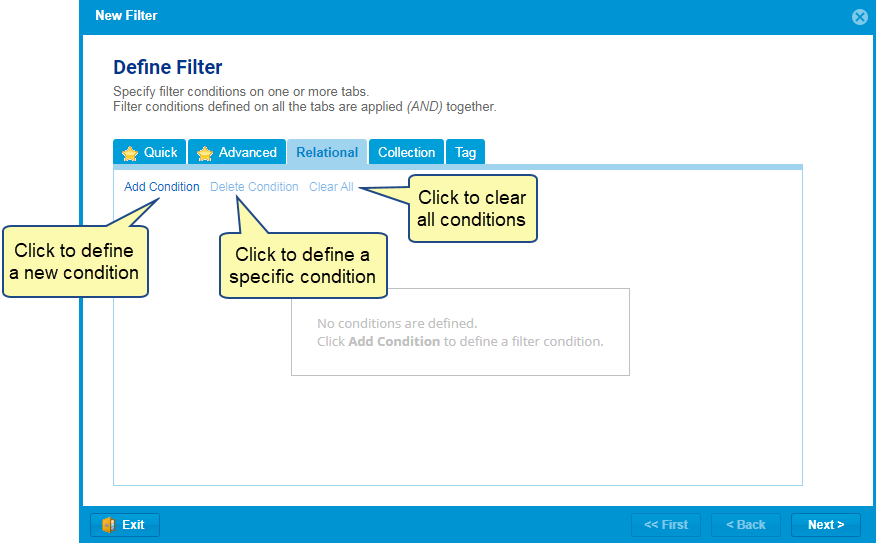
Quick
In the Quick tab, click Add Condition to define a new condition. Click Clear All to delete all conditions.
Advanced
Advanced Filter is a data filter that allows you to display data by specifying multiple conditions.
In the Advanced tab, you can do the following:
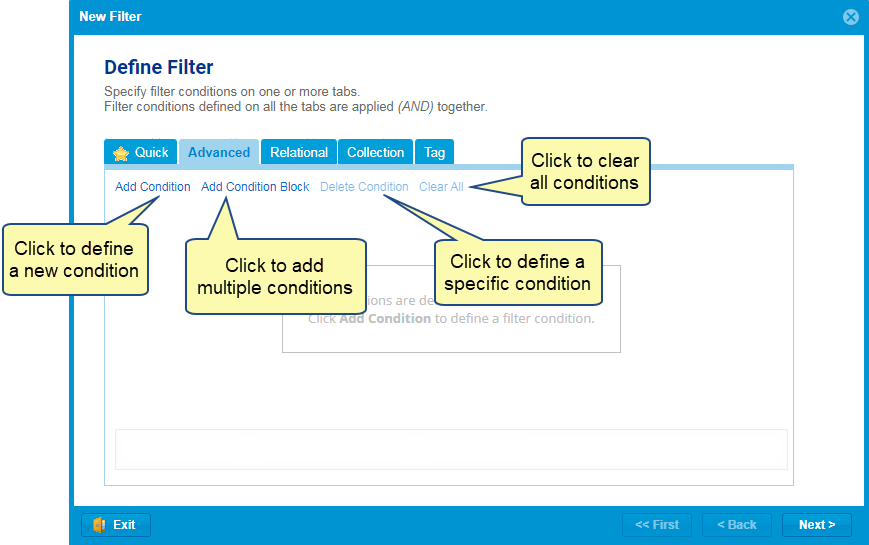
You can create multiple conditions by clicking Add Condition. If you have created multiple conditions, you need to connect them logically. TopTeam allows you to connect multiple conditions based on the logic mentioned below:
- AND
- AND NOT
- OR
- OR NOT
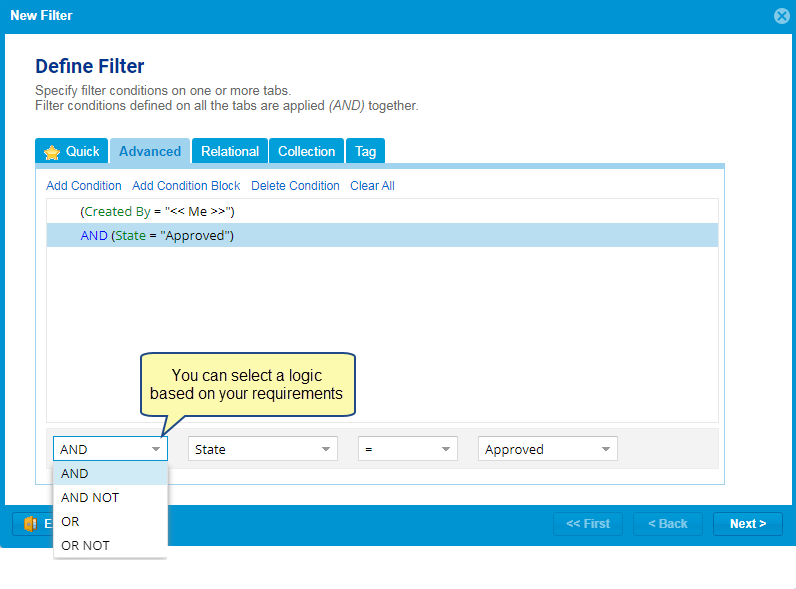
For example, we have created the below conditions:
(Created By = “<<Me>>”)
AND (State = “Approved”)
With these conditions, TopTeam will fetch artifacts created by Me (Logged in user) and whose state is Approved.
(Created By = “<<Me>>”)
AND NOT (State <> “Approved”)
With these conditions, TopTeam will fetch artifacts created by Me (Logged-in user) and whose state is not Approved (all the artifacts whose state is anything other than Approved will be fetched).
(Created By = “<<Me>>”)
OR (MoSCoW = “Must Have”)
With these conditions, TopTeam will fetch artifacts created by Me (Logged-in user) or whose MoSCoW status is Must Have, irrespective of the creator.
(Created By = “<<Me>>”)
OR NOT (MoSCoW = “Must Have”)
With these conditions, TopTeam will fetch artifacts created by Me (Logged-in user) or whose MoSCoW status is set to something other than Must Have, irrespective of the creator.
While connecting multiple conditions logically, you can use the Add Condition Block feature.
Add Condition Block allows you to add parenthesis to define the order of fetching artifacts.
This feature is similar to the parentheses used in Algebraic/Mathematical expressions primarily to modify the regular order of operations. Therefore, the terms present inside the parentheses () are evaluated first in an expression involving parentheses.
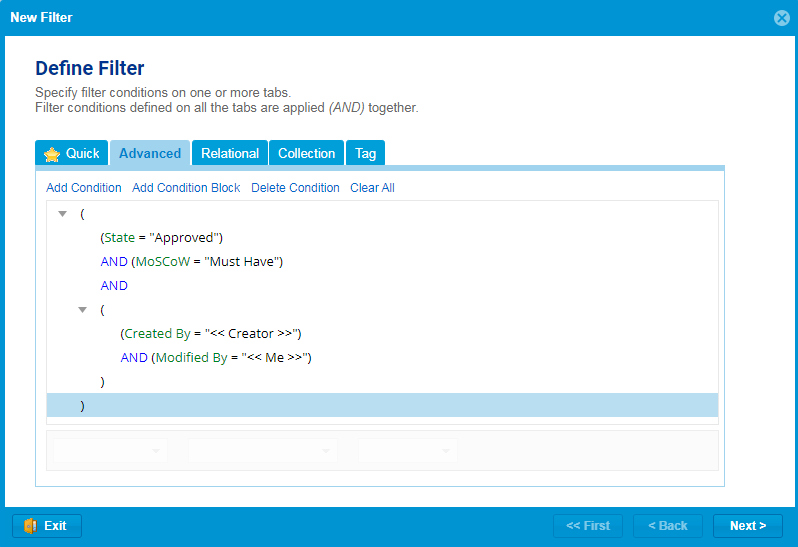
Let’s see what TopTeam will fetch if we have created a condition, as mentioned in the screenshot above, using the Add Condition Block.
With these conditions, TopTeam will first fetch the artifacts created by any user and Modified by me (Logged-in user). After that, TopTeam will fetch the artifacts whose State is Approved, and MoSCoW is set to Must Have.
Relational
In the Relational tab, you can do the following:
When you click Add Condition, a new wizard (Relational Filter Condition Wizard) will open.
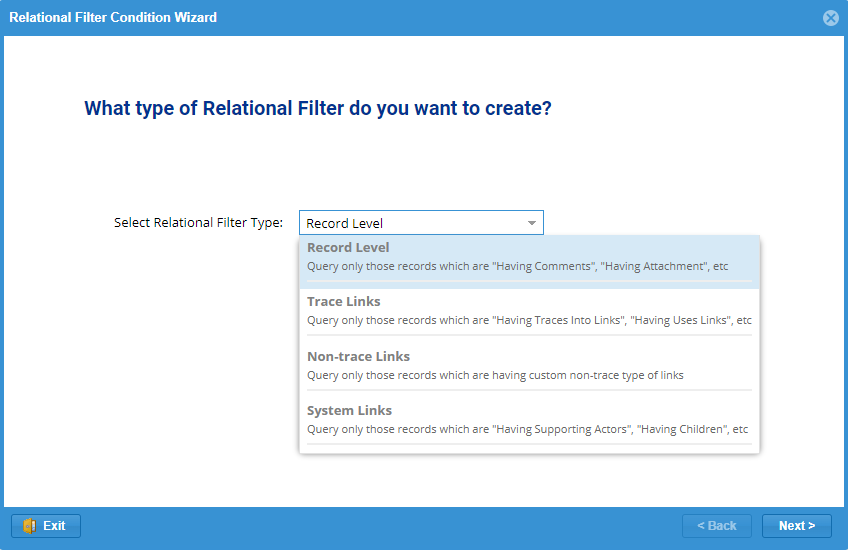
In this wizard, you need to define the criteria below:
- What type of Relational Filter do you want to create?
- Which records (artifacts) with or without conditions do you want to query?
| HELP
|
Learn more about filtering artifacts based on relational filters from the link below:
How to Use Relational Filters to Query Artifacts in List and Tree Editors |
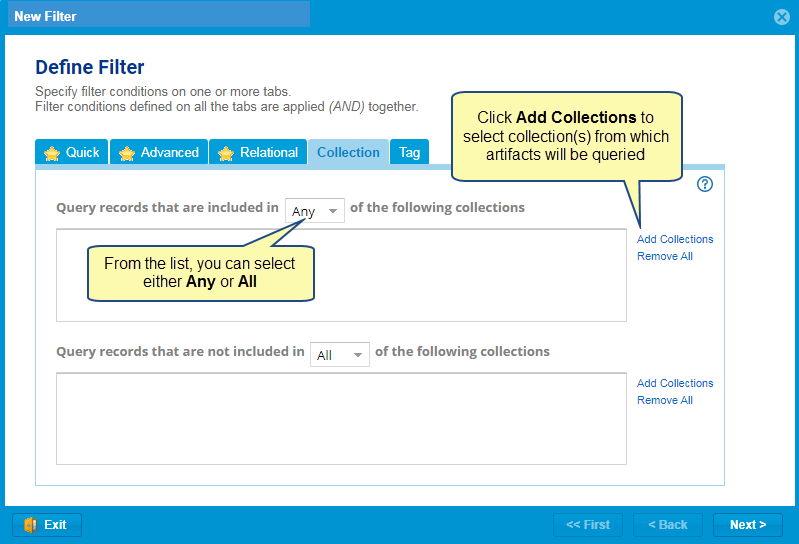
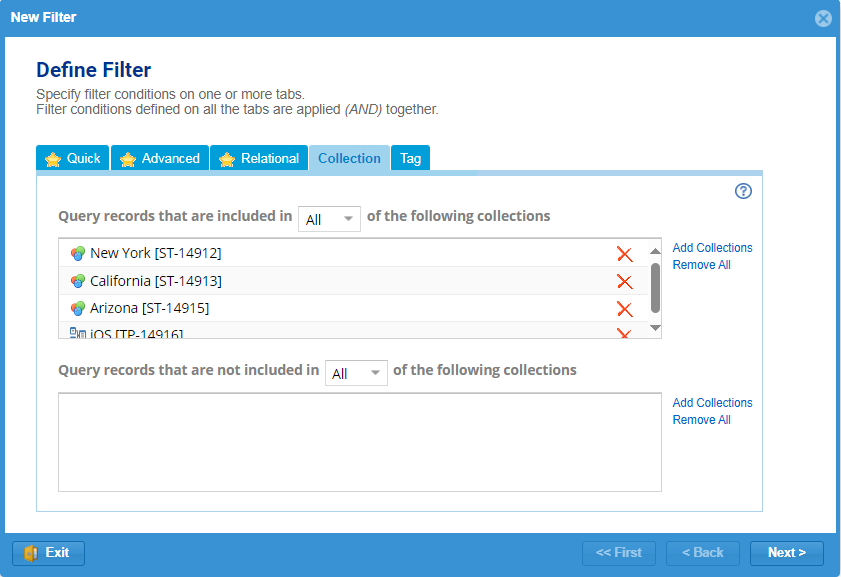
Collection
In the Collection tab, you can query artifacts that are INCLUDED IN and NOT INCLUDED IN any or all of the specified collection(s).
| HELP
|
Learn more about filtering artifacts based on collections from the link below:Filtering Artifacts based on Collections using Tree/List Editors |
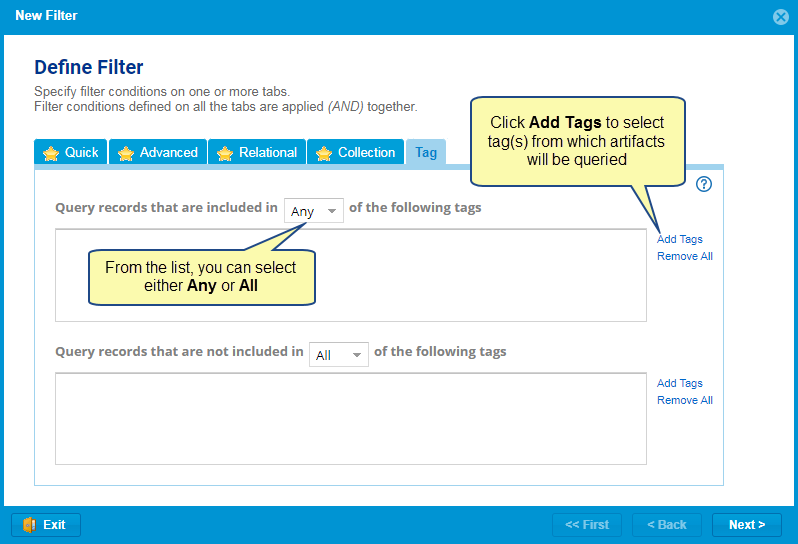
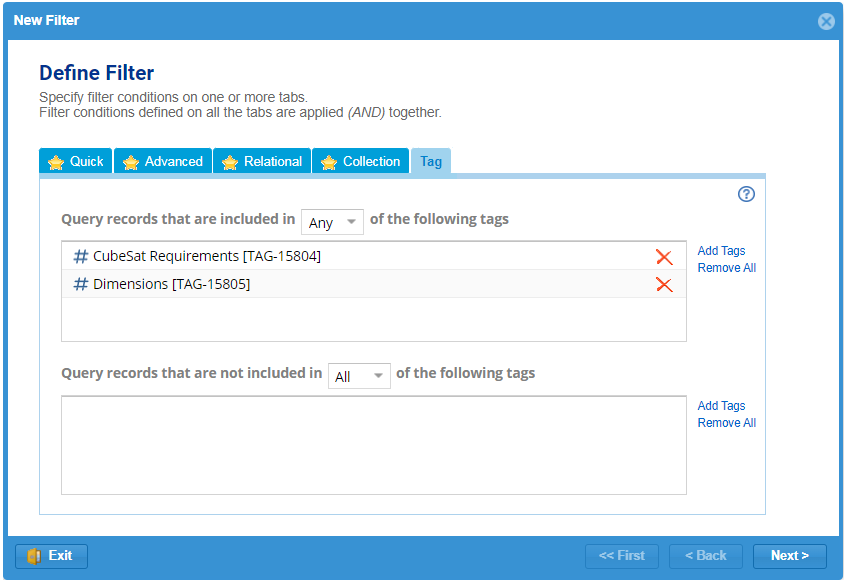
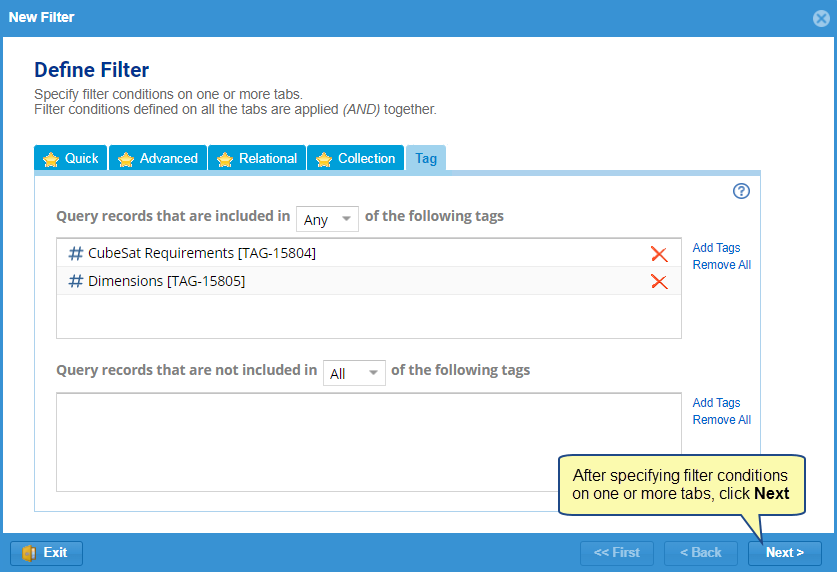
Tag
In the Tag tab, you can query artifacts that are INCLUDED IN and NOT INCLUDED IN any or all of the specified tag(s).
Step 4. After specifying filter conditions on one or more tabs, click Next
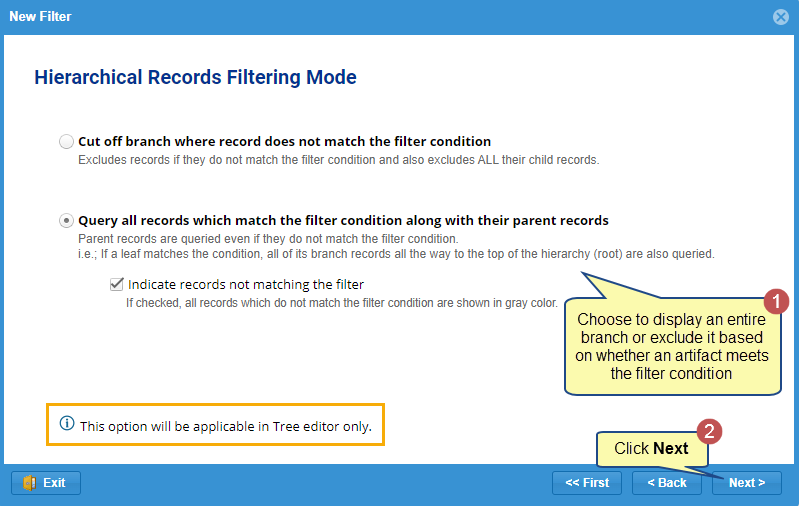
Step 5. Choose Hierarchical Records Filtering Mode
This option will be applicable in Tree Editor only.
Step 6. Enter a Name and save the filter
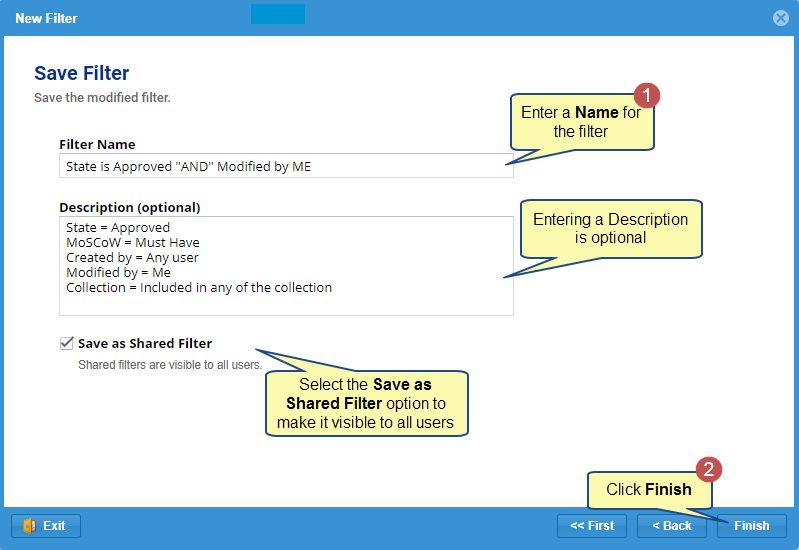
TopTeam automatically retrieves artifacts based on the criteria you provide once you save the filter.
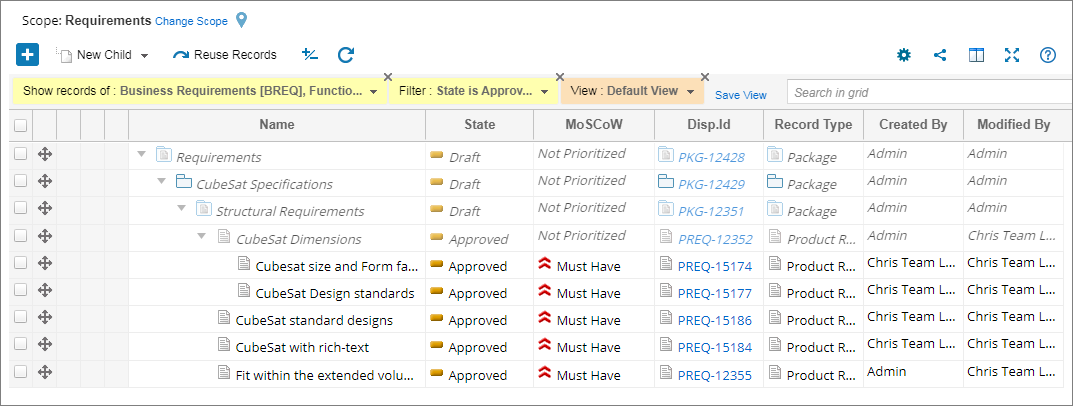
You can see all of your saved filters under the saved filter tab.
Related Articles
How to Use Relational Filters to Query Artifacts in List and Tree Editors
Revised: December 8th, 2023