Overview
In TopTeam, the Authentication Profile (saved credentials) feature allows you to securely store your Jira login credentials for future use. This eliminates the need to repeatedly enter your credentials, enhancing user convenience.
This article guides you through the process of setting up and maintaining a secure authentication profile.
Benefits of Authentication Profiles
- Security: This feature ensures your login information is safeguarded, eliminating the need to share your authentication details with other users who are configuring mappings or accessing your account. For instance, if you’re working in a team where multiple members need access to the same Jira project, instead of sharing your personal login details, you can create an authentication profile.
- Convenience: Once an authentication profile is saved, you can use it to connect to Jira with just a few clicks. This eliminates the need to manually enter your credentials every time, saving you time and effort.
- Consistency: If you frequently connect to Jira using the same credentials, using a saved authentication profile ensures that the connection details are consistent every time. This can help avoid connection errors due to incorrect or inconsistent details.
Version Information
The Authentication Profile feature is available in TopTeam version 20.80 or later. You can verify your current TopTeam version by navigating to Help > About TopTeam Requirements in the application.
Topics Covered
In this article, we will guide you on how to:
- View Authentication Profiles
- Create Authentication Profiles
- Use Authentication Profiles
- Modify Authentication Profiles
Prerequisites
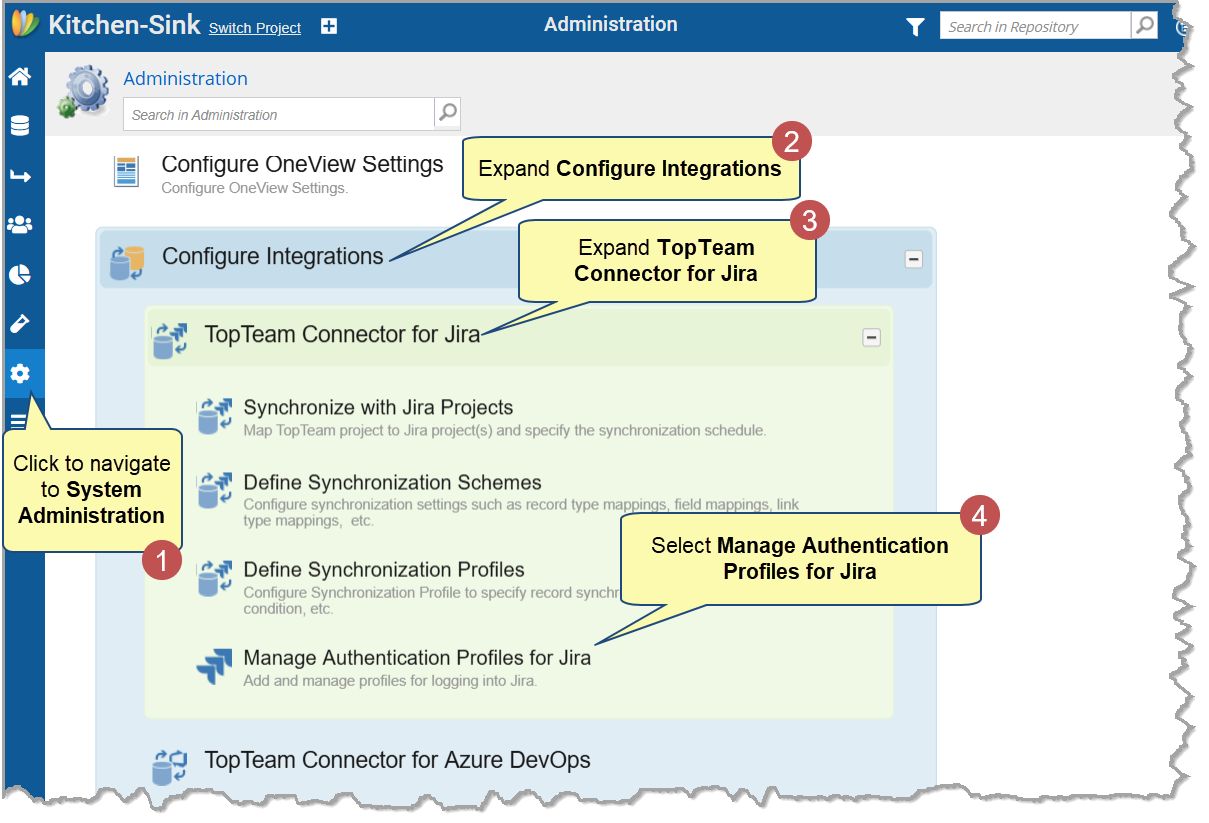
You must be a System Administrator or have the Manage External Keys permissions to manage authentication profiles. You can check your permissions by navigating to Administration > Manage User Accounts in TopTeam.
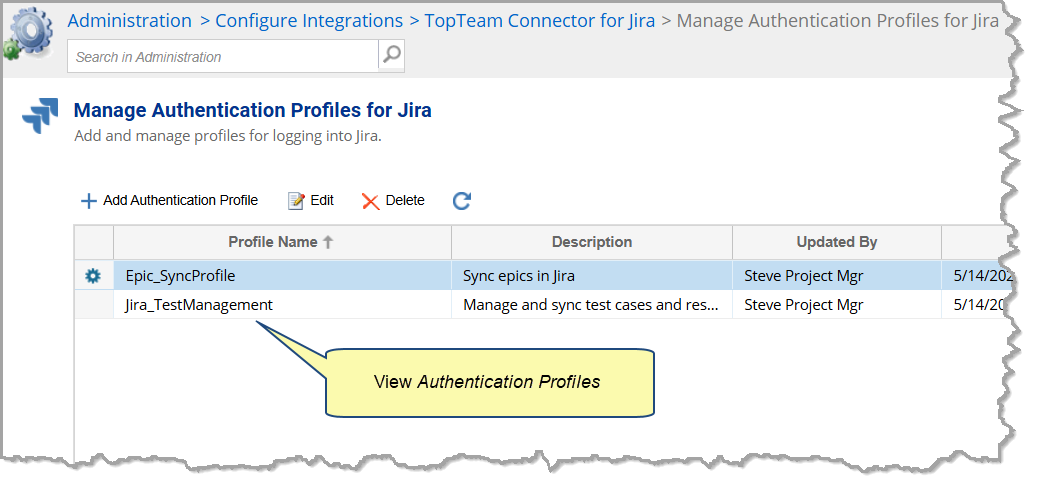
Viewing Authentication Profiles
You can view a list of all the authentication profiles created for Jira integration.
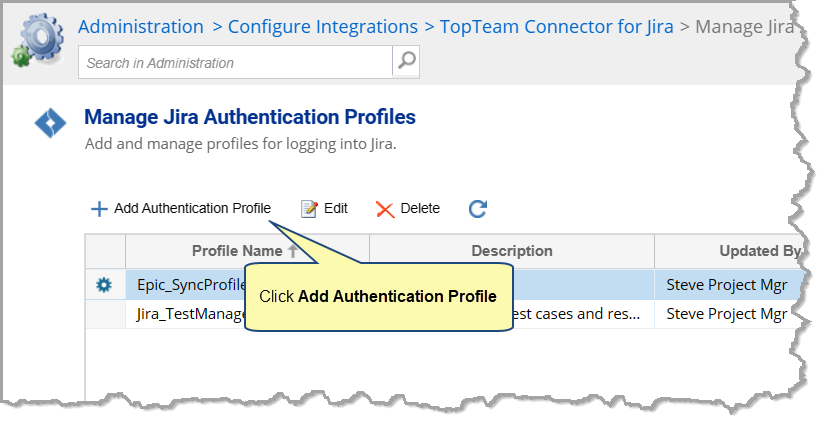
Creating Authentication Profiles
Step 1. Click Add Authentication Profile
Step 2. Specify the profile details
Specify the authentication profile details, such as REST URL, Username, API token, name, and description (optional). You can find these details in your Jira account settings.
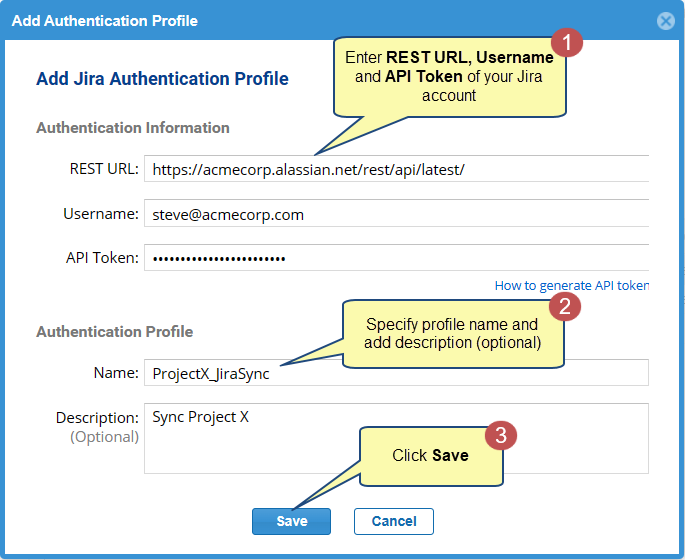
- REST URL: Append ‘rest/api/latest’ to the URL used on the browser for Jira.
- Password/API Token: Specify ‘Password’ if Jira Server is on-premise. Specify ‘API Token’ if Jira server is on cloud. An API token is a unique identifier of an application requesting access to your service.
|
TIP
|
Use How to generate API token to generate a new API token. |
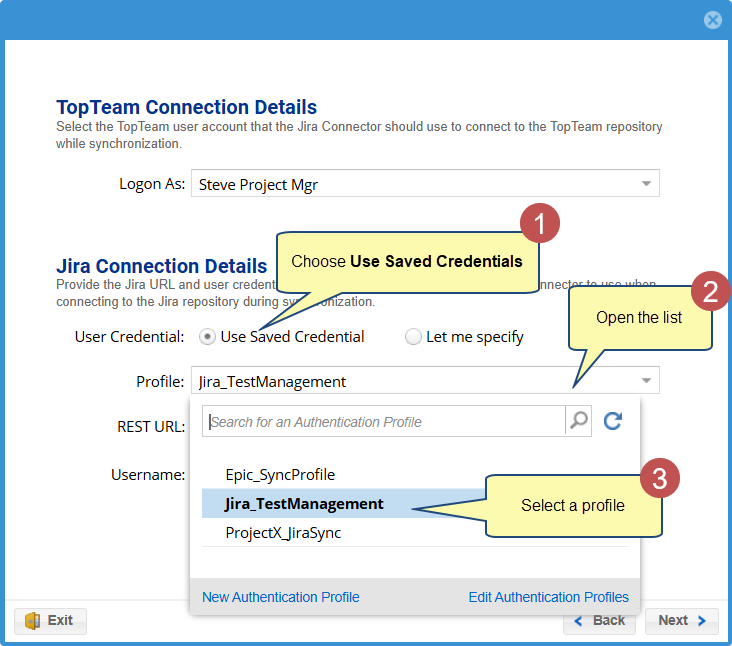
Using Authentication Profiles
While creating synchronization schemes and scheduling synchronization for TopTeam and Jira synchronizations, you can use these profiles to connect to the Jira application.
While creating a synchronization scheme, use a saved authentication profile.

|
HELP
|
You can access online help for Defining Synchronization Schemes and Profiles from the link below: |
Similarly, while defining project mappings, you can use a saved authentication profile.
|
HELP
|
You can access online help for Defining Project Mappings from the link below: Configuring a TopTeam-Jira Project Mapping for Synchronization |
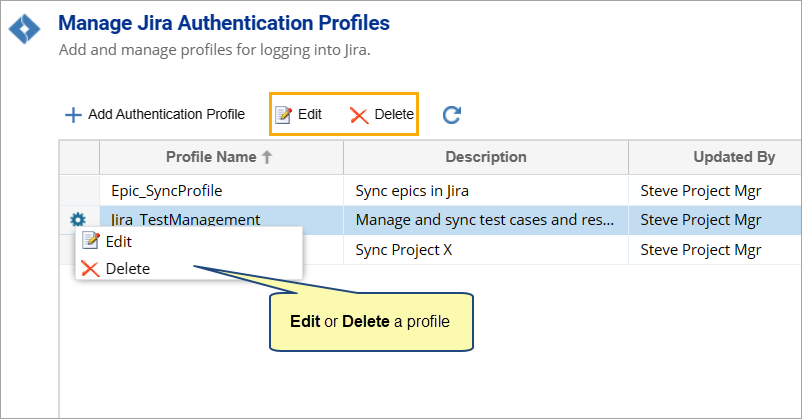
Modifying Authentication Profiles
Select the authentication profile you want to modify, and then click Edit or Delete on the gear menu or toolbar. Use Edit to change the details of the profile and Delete to remove the profile completely.
See Also
Revised: August 26th, 2025